Loading...

Related products
-
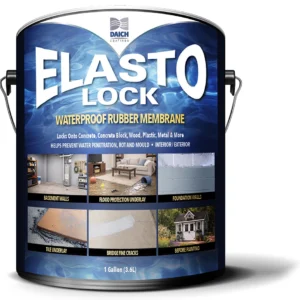
ElastoLock
Price range: 47.95 CA$ through 184.95 CA$Select options This product has multiple variants. The options may be chosen on the product page -
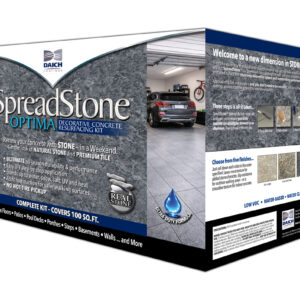
Daich SpreadStone™ OPTIMA Concrete Resurfacing Kit
Price range: 265.99 CA$ through 671.99 CA$Select options This product has multiple variants. The options may be chosen on the product page -
Sale!
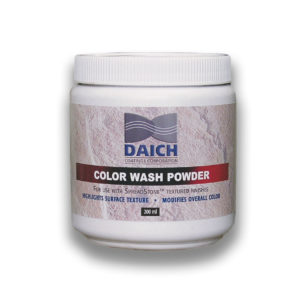
Colour Wash powder
Original price was: 23.73 CA$.19.53 CA$Current price is: 19.53 CA$.Select options This product has multiple variants. The options may be chosen on the product page -
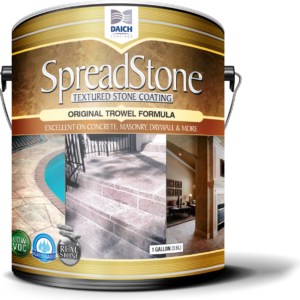
SpreadStone Original
Price range: 37.44 CA$ through 189.95 CA$Select options This product has multiple variants. The options may be chosen on the product page
Sharen McConnell (verified owner) –
I found the Spreadstone Mineral Select Countertop Finishing product to be quite easy to work with. Taking time with each step to ensure the best result is imperative. I have used this product in the black, lodestone, white, and onyx fog colors. Every one of them turned out beautifully. So far I have completed 8 countertops for friends and businesses. I must say everyone, including myself were super pleased with the results. I am so pleased that I found this product back in 2019 and plan to use it well into the future. I recently used the white Marble Dream refinishing kit and got a gorgeous result. Thank you Daich, I love you Countertop products.
Beth –
I recently completed this DIY project and I’m very satisfied with the results! I love the soft onyx fog color and I think the finish appears more professional than the cost of materials would indicate. The fact that the products are water-based is definitely an advantage. I highly recommend you test the process on a scrap piece of laminate or wood, making sure to use a roller to apply the stone coating so that you can perfect your technique and apply the amount you desire; also test the amount of sanding that appeals to you (the clear coat doesn’t need to be tested). If you’re not satisfied with the consistency of the stone coat on the countertop, you may sand and reapply stone until satisfied. I applied 3 coats of primer (the base coat; I originally purchased the white stone kit, which is why the primer is tan instead of gray), 2 coats of stone along with some touchups (I wanted the stone a bit spread out), and 3 coats of clear coat. You may know that you can wrap the used roller in plastic wrap and then inside a towel instead of washing in between coats of each component (the roller will remain softer than if washed), just use a different roller for primer, stone, clear coat.
Tammy Horvat –
The value we received using the SpreadStone Countertop Finishing Kit saved us thousands of dollars in having to replace our countertops. The best part was how easy it was. We watched the video, followed the directions and got new countertops in just one weekend.
Ross (New Zealand) –
Wasn’t too sure about Spreadstone to ‘get rid of our Glossy Black man made stone bench and vanity tops.
Am absolutely rapt with the results.
After 14 months.
I actually didn’t use the sand paper supplied I used wet and dry sandpaper, wasn’t too sure it would work but didn’t want the dust all over the rooms.
Worked really well
Evard DeMott –
The countertops in our older home were looking a little dated so I shopped around and was shocked by what a new counter would cost. I decided to go with the cheapest option (formica) because I didn’t want to sink $5000 or more into this project. I found SpreadStone online and decided to give it a try. Application was quite easy and straight-forward and I was extremely pleased with the results. With the money I saved by refinishing the countertops myself with Daich, I took a trip to Germany. That was in 2016 and the SpreadStone has definitely stood the test of time. I’ve experienced a tiny amount of cracking in one spot and oil from a candle reacted and removed a small spot of the coating. Other than that, the countertops look as good as they did 8 years ago. I did recently add another coat of clear gloss on the areas that we use the most. In addition, I used the left over product to finish several countertops I built for our camping adventures. I am very satisfied with SpreadStone and would recommend this fantastic product.
Irene Garrett –
2 years later and my countertops still look as day 1 after refinishing. It’s the best interior upgrade decision I ever made. All visitors compliment my kitchen and I’m always beaming with pride because I made it with my own hands 🙂
Do not hesitate!
Billie L. Hale –
Installed on kitchen countertops two years ago (while my wife was in the hospital with covid). Installation was straightforward and easy. After two years of medium use it still looks as good as the day I put it on. Looks great and cleans up real easy. We are thrilled how much better they look than the old laminate. The durability has been exceptional.
Lisa –
We are 3 years in and my countertops still look like they did on the first day. There are no chips and no heat damage. The only thing is a coffee stain because someone put a spoon with coffee on it before it had a chance to fully cure (that’s on us). Using this product is one decision I do not regret. Now that we are changing the floors and refacing our cabinets, the colour we chose doesn’t work, so we are repurchase this product in a different colour.
Jennifer –
5 years in and our countertops still look great! I’ve had to retouch a few spots from water damage and dropping cans. I wouldn’t change my decision. Love this product!
Brenda Lucas (verified owner) –
I have done my counter tops and my mother in laws counter tops. Easy to do and customer service has been great. I can only say WoW they look great and holding up awesome.
Susan Savo –
We have had our kitchen counters now for 2 years and it is still holding up great. I am so happy I took the chance and did this. I am now thinking of getting the Luxe kit and topping them off for even more of professional look. May finally get around to doing the bathrooms too.
Marjorie Walrath –
After watching all the videos and reading literally hundreds of reviews, I had my old sink removed and proceeded to cover 64 sq ft of red laminate countertops with Mantlestone. I am very pleased with the results. Hardest part was getting the flecks even. It just didn’t look right after second coat, so I had two glasses of wine and did a third coat. Much better! I splotched it on with the brush to get flecks where I wanted them, then lightly rolled to even it out. I did a LOT more sanding to the stone coat than is in the instructions, both by hand and with an orbital sander. It took me the better part of a day to do just the sanding, but I’m pretty picky and wanted a very smooth finish. This required a lot more sandpaper than comes in the kit, of course, but that’s a minor expense. I finished with 220 grit sandpaper. I was a little concerned about the color but reserved judgment until after the first top coat. At that point, I realized the color didn’t match the Mantlestone sample I got from Daich; it was more towards a blue gray than the brownish gray of the sample. Since I was trying to match a new quartz composite sink, I wanted to correct the color. My local paint dealer sold me a small amount of orange pigment, and I added a couple drops at a time to the topcoat until I got the desired effect. It was just enough orange to kill the blue tones, and now my counters exactly match the sample and my new sink. I did a total of five top coats, and will probably recoat in a year as other reviewers have suggested. I would absolutely do this again, and the bathroom counters are probably next. I’ve done a lot of painting, and Daich’s products are really nice to work with. Cleanup is a breeze.
Amy –
Absolutely love the way my counters turned out, and it was really easy! Only feedback/reminder to others is that the second stone coat needs to cure 24 hours before the first top coat is applied…and probably before it’s sanded too, and that’s not super clear in the instructions (24 hours is only mentioned in the top coat section; not with the stone coat instructions).
Gail (verified owner) –
Love this product! So easy. Just follow the directions, be patient and I recommend when sanding going from 80 to 220 sandpaper for a super smooth surface. And a sander
Heather Adewale –
Looks great but cracking around sink area. This is a great option for an island or area where there will be no water exposure but all of the area around our sink has started to show a little tiny cracks within 2 to 3 weeks of application. We do not let the water pool in this area very long and even put three coats of the final clear coat on. It is wiped up every evening after doing dishes, but obviously some water is going to get on the area while the dishes are being done or while they are air drying in the mat nearby. We used the natural white based color kit, and also noticed it stains very easily with certain stains like tomato and curry and hot sauce.
Tracie Calloway (verified owner) –
Love the product. Worked exactly as stated and we ended up with a great look. The only thing I wish they would offer is a touch up kit or mini kit for the long haul, since I anticipate this lasting a long time and we want to replace our sink, but concerned about not being able to touch up anything around the sink that gets messed up.
Paul Moens –
Just finished resurfacing our countertops today and it looks amazing. Easy to do just takes a little time in between coats. Definetly worth the time and effort.
Linda Edwards –
Did our kitchen last year and wanted to wait to see how it actually held up. Could not be more pleased! Used Volcanic Black over green formica. I watched every review and how-to video available before I started. Go slow and follow the instructions! Be sure to cover everything – there will be a lot of dust! Have had SO many compliments – I wish I could post before and after pics here. Highly recommend.
Lori Campbell –
I wanted to update my kitchen but my countertop was in pretty good shape. I just wanted to change the color. Process was pretty easy, I did it over a holiday weekend. Very happy with the results.
Izabel Vadnais (verified owner) –
Super résultat! Nous sommes bien heureux de notre nouveau comptoir de salle de bain 🙂
Kera Mizok –
Love love love! Its an amazing transformation! Love the price and look of this! A brand new kitchen!
Chuck Darsey –
August 22, 2022
I found this product online and ordered it through Home Depot. I’m using volcanic black for my kitchen countertops which were originally wood grain Formica 1970. Like everyone else on this thread I was a bit nervous at first. I read the instructions 20 times and watch the video 20 times. At every step along the way I re-watched the video and reread the instructions. Take your time. Patience is a virtue. I absolutely love The transformation in my kitchen. At one point I did have a question and I emailed Daich coatings even though it was on the weekend and they answered me within 24 hours. Make sure you cover your floors. Make sure you cover your cabinets. And keep a clean up cloth close to you. Use the blue painters tape and apply it very precisely. And after the job is finished and cured, take the painters tape off very slowly and use a razor blade to keep the line crisp. Well worth $120!
Virginia Lesher –
I resurfaced m kitchen countertops with the countertop finishing kit Onyx Fog. I was very nervous about doing this project myself as I had never done it before. Boy was it Easy! And my countertops are beautiful. I love this product!!!
Theresa –
Using Onyx Fog. I had a little trouble rolling on the stone coat. It kept clumping and spreading it out caused the brown flecks to smear. On the second coat I dabbed with the paint brush and then used the roller to smooth. That worked much better. Twenty four hours later I sanded in preparation for the top coat. After sanding I had a couple spots that needed retouching. I cannot find any information on whether I can go ahead and apply the top coat after a few hours of letting the touch up dry or if I need to wait another 24 hours. The video says to touch-up spots if necessary but doesn’t mention how long to wait afterwards. To be on the safe side I will wait another 24 hours before top coating. I just wish there was more information available. Today is Saturday so cannot reach anyone at Daich until Monday and by then I will already have waited the additional 24 hours and finished the top coat. So far I love the look. I am putting it over very old tile countertops. I filled the grout lines with a filler/leveler and I cannot see any lines under the stone coat. So much better than my old countertops!
Kimberly (verified owner) –
I love that it looks better than my old counter top and although it is smooth to the touch some spots look blotchy and clumpy because I don’t think I sanded enough! Overall it’s great and easy I just wish they did more explaining when it came to sanding and I think it would have looked better than it currently does
Irina Gazetkina (verified owner) –
I am absolutely in awe at the spreadstone product! My outdated 1970s style laminate counters are completely transformed to a beautiful bright white style and a new century look. I had a friend come by and stare at my counters today for a long time and he couldn’t figure out how I accomplished this transformation! He couldn’t tell that it was a paint-on kit and I was very proud to keep him puzzled. Couple days of work is well worth it. It is easy to apply – just takes a bit of patience and time.
Leta Druzetich –
Amazing results! We were a little nervous about using this product on our bathroom countertops- our sinks are part of the countertop (cultured marble) and we just didn’t know how the stone would look on the bowls of the sink. It turned out perfectly! We did email the company with a couple of questions and they were quick with a response. Very well satisfied!
Kim Cunningham –
Five years ago I bought two counter kits (Oyster?) to try to cover my old dark green countertops in my kitchen. I kept putting off using it because I was scared to screw it up, but eventually I got up the nerve and tackled it. It was pretty easy to do and it came out great! I had someone help me remove the sink, but I did everything else myself. Five years later and it still looks great, even after using this home as an Airbnb rental property! Don’t be scared….just do it!
Wendy Eckard –
This totally transformed my kitchen! I love it! Wish I knew about this sooner!
Jeff Welton (verified owner) –
Amazing results – we did this as part of a kitchen makeover, including replacing the cooktop and sink, so were able to work with completely bare countertops. My only mistake was applying the stonecoat a bit too thin in places, so the primer showed through when I sanded – that’s on me and not a reflection on the product. After I caught that, a couple of “fixups” later, we’re happier than anything! Used two kits to cover 31 linear feet of countertop and had a fair bit left over. It’s been in place for a month now and has survived spills and some dummy (me) chopping into it with a cleaver trying to cut frozen butter without a cutting board. Didn’t even leave a scratch! Very satisfied with the result and can’t beat the price!
Kelly –
My mom refinished her prized dining room table over 15 years ago using this product. With 5 grown kids, 8 grandkids and plenty of entertaining friends and relatives, the table looks as good today (2021) as it did in 2006 when freshly completed. I’m looking forward to refinishing my own bathroom and kitchen countertops.
Tammy Orner –
I resurfaced my dining room table top with the volcanic black. Absolutely amazing! I will be ordering product to do my kitchen counters next.
Sandra Morral –
awesome stuff to use.
dale a dawson –
I want this!!!
LC (verified owner) –
I had a dark green laminate countertop that was new when we moved into our house over 20 years ago. It owed us nothing, but was in decent shape other than a few chips and dings. After months of research (and trying to convince the hubby) I decided to order the bright white. I was a little nervous because I couldn’t find any reviews or photos of the bright white color. I’m not the world’s best painter (hate it) but other than dropping a half full can of the primer on the floor (expletive) the process was pretty seamless. The can landed upright and just splattered everywhere but I had just enough to finish the base coat. The process is time consuming though, so plan on a whole weekend, but it’s totally worth it. I love my counters new look! I didn’t use the counters for an entire week to be sure the counter had properly cured. First thing I did was drop a heavy glass bottle on it from the shelf about 2 feet above (expletive again). I held my breath as I checked the surface and there was not so much as a scratch! Beautiful and strong. I would definitely recommend this product and would use it again if the opportunity presented itself.
Lilian Rogers –
This is my second time refinishing an ugly old Formica counter. Just be cautious to not get carried away with sanding but even if you take off too much of the « stone » coating, it’s a very forgiving process and easy to recoat. I highly recommend this product for the fantastic results that are so economical. This is one of the most satisfying diy projects because of the ease of use, low cost, and excellent results!
Joyce schnoor –
Excellent product. Counter looks great!
Anna Ryan –
Resurfaced a pebbled burgundy counter top with oyster and it turned out beautiful. Applied 3 coats of the clear finish and I recommend redoing it once a year to maintain the look, as lots left over. Only step I overlooked was not pulling up my sink to apply under edging so now I have to put clear silicon around sink so the water won’t lift the edges. Scrubbed the old counter with metal scrubbie and you would not believe how much ground in yuck came up…but was spotless and product went on fabulous!